Sidebar
Adjusting Amplitude, Timing and Scaling in the Graph Editor
Summary
Animation curves can be scaled, translated, inverted or mirrored with the selection tool in the Carrara 8.5 graph editor.
Process Overview
- Access the Graph Editor
- Select Desired Track(s)
- Select Key Frame(s)
- Adjust Selection
Foundation
This assumes that the user has already set up an animation in either the timeline or the graph editor of the Carrara 8.5 sequencer.
Access the Graph Editor
Step 1
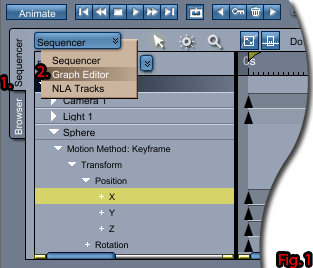
Open the sequencer in Carrara 8.5 (see fig. 1). The sequencer can be accessed by clicking the sequencer tab in the bottom left corner of the interface.
Step 2
Enter the graph editor mode by selecting “Graph Editor” from the drop down menu in the sequencer (see fig. 1). The drop down menu is located in the top left corner of the sequencer.
Select the Desired Track(s)
Step 1
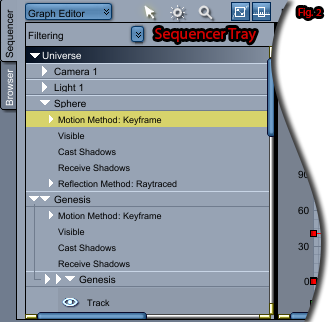 The sequencer tray has a hierarchical list of every item within the Carrara Scene. Locate the desired object(s) to be edited within the sequencer tray (see fig. 2). The objects will be grouped under the “Universe” heading.
Step 2
Each object can be animated along multiple tracks. Static props can be animated along X,Y and Z coordinates with respect to translation, rotation, and scale. Figures with rigging such as the Genesis figure and Genesis 2 Female can have each node animated within the constraints of the joint.
To expand a track to see any sub-tracks simply click the white triangle next to the track. An upside down triangle indicates an expanded track while a sideways triangle indicates that the track is collapsed (see fig. 2). Expand the master track(s) until all desired sub-tracks are visible. To select a track or sub-track simply click on it in the sequencer tray.
The graph editor allows for multiple tracks to be selected within the sequencer tray. Hold down the Control or Command key to make multiple selections in the Graph Editor.
Select Desired Key Frame(s)
Method 1
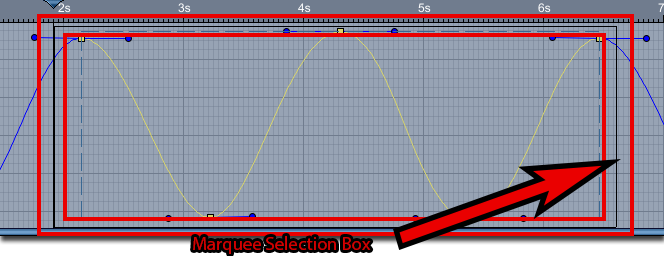
The easiest way to select key frames in the graph editor is to use the marquee selection to draw a box around the desired key frames. This method is ideal when viewing only one animation track at a time.
To draw a marquee box activate the marquee tool or the selection tool and then click and drag to create the marquee box.
To cancel a selection simply click anywhere inside the graph editor interface.
Method 2
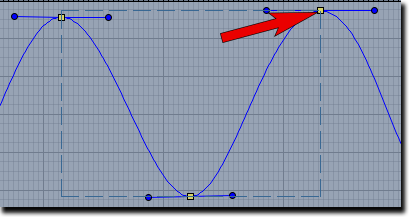
Key frames can also be selected by clicking on the key frame itself. Multiple key frames can also be selected in this manner. This method is best if there are multiple tracks selected within the graph editor, or a finer selection must be made.
To select a key frame make sure the selection tool is activated. Next click on the desired key frame. If multiple key frames are desired hold down the shift button and select the desired key frames.
To cancel a selection simply click anywhere inside the graph editor interface.
Adjust the Selection
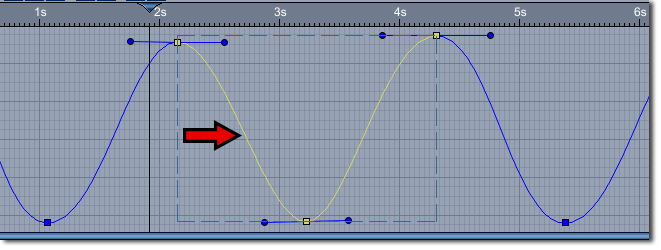
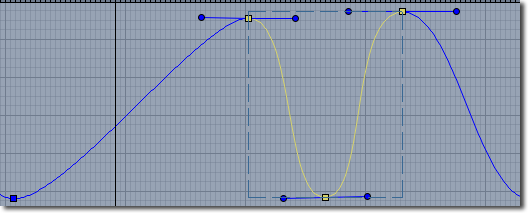
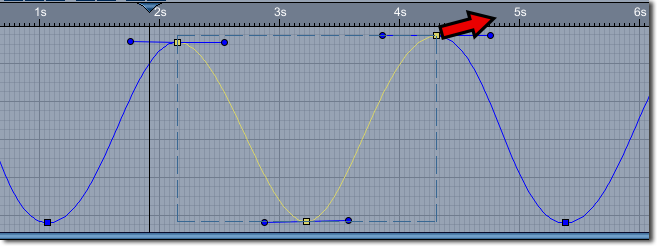
Selecting multiple key frames in the graph editor provides the user with a dashed bounding box around the selection (see fig. 5). This box is known as the 'Selection Box.' The selection box can be manipulated in various ways to adjust the amplitude, timing, scaling and other features of the animation.
Adjusting Amplitude
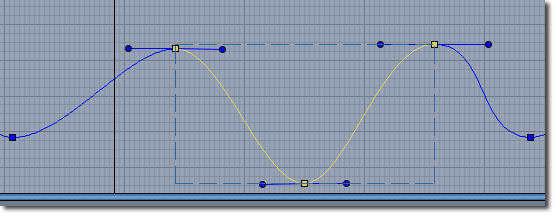
Amplitude refers to the strength of the animation and is adjusted in the Y-axis of the graph editor. The farther apart two key frames exist in the Y axis the stronger the animation will be. Amplitude can be adjusted in the following ways:
- Increasing amplitude by raising the upper limit.
- Decreasing amplitude by lowering the upper limit.
- Increasing amplitude by depressing the lower limit.
- Decreasing amplitude by raising the lower limit.
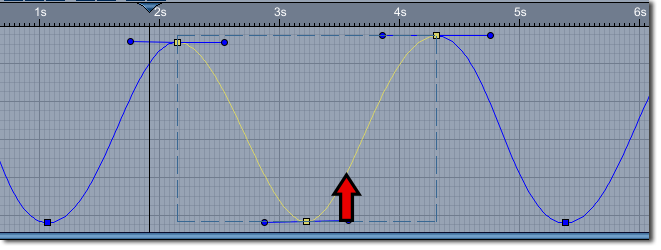
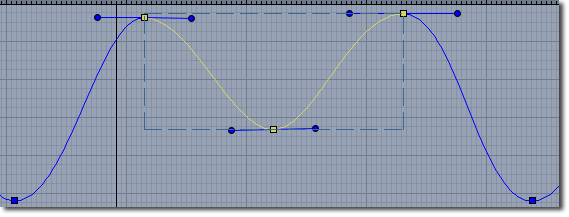
To raise the upper limit of the animation simply click on the top border of the selection box and drag up. This will increase the distance between the lowest valued key frames and the highest valued key frames by increasing the value of the highest key frames and preserving the relative spacing between all key frames in the selection box.


To lower the upper limit of the animation simply click on the top border of the selection box and drag down. This will decrease the distance between the lowest valued key frames and the highest valued key frames by decreasing the value of the highest key frames and preserving the relative spacing between all key frames in the selection box.
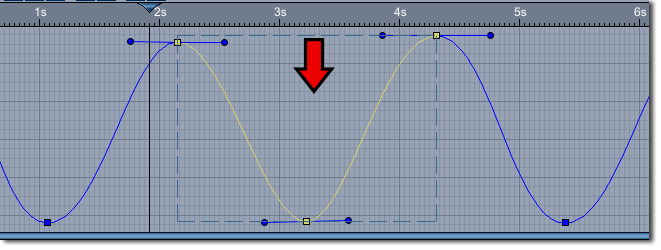
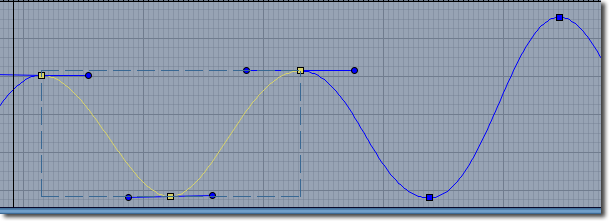 To depress the lower limit of the animation simply click on the bottom border of the selection box and drag down. This will increase the distance between the lowest valued key frames and the highest valued key frames by decreasing the value of the lowest key frames and preserving the relative spacing between all key frames in the selection box.
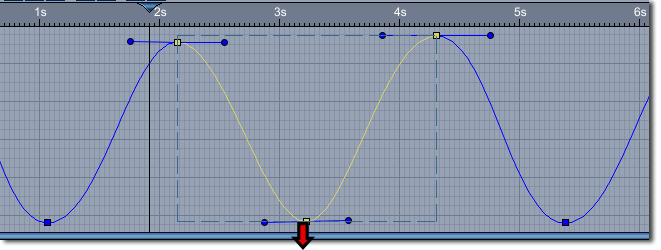
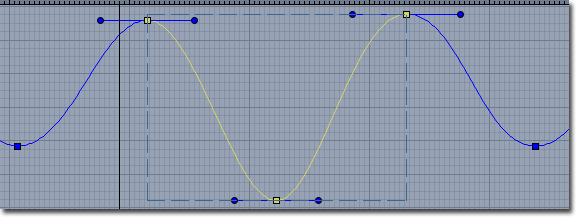
To raise the lower limit of the animation simply click on the bottom border of the selection box and drag up. This will decrease the distance between the lowest valued key frames and the highest valued key frames by increasing the value of the lowest key frames and preserving the relative spacing between all key frames in the selection box.
Adjusting the Timing
Timing refers to the time it takes to get from one point in the animation to the next. Timing is adjusted in the X-axis of the graph editor. Timing can be adjusted in the following ways:
- Increase the duration of the selection by extending to the right.
- Decrease the duration of the selection by shrinking to the left.
- Increase the duration of the selection by extending to the left.
- Decrease the duration of the selection by shrinking to the right.
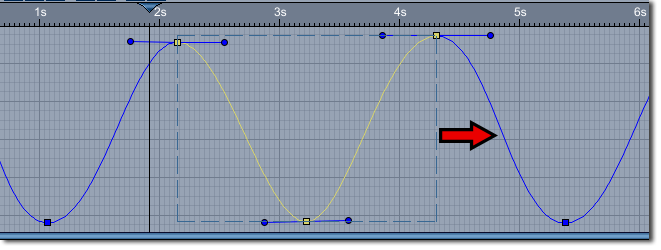
To increase the duration of the selection by extending to the right simply click on the right border of the selection box and drag to the right. This will move the right key frame down the timeline while preserving the relative spacing between all key frames in the selection box.
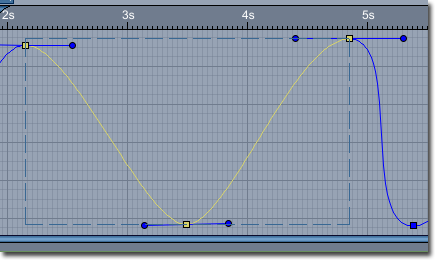
To decrease the duration of the selection by shrinking to the left simply click on the right border of the selection box and drag to the left. This will move the right most key frame up the timeline while preserving the relative spacing between all key frames in the selection box.
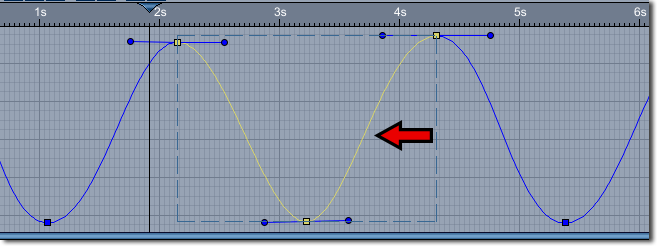
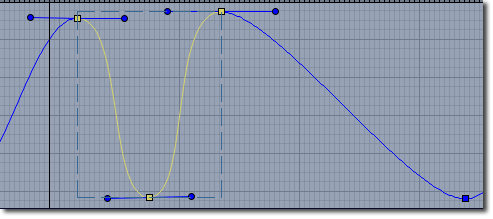
To increase the duration of the selection by extending to the left simply click on the left border of the selection box and drag to the left. This will move the left most key frame up the timeline while preserving the relative spacing between all key frames in the selection box. The selection cannot be extended past zero.
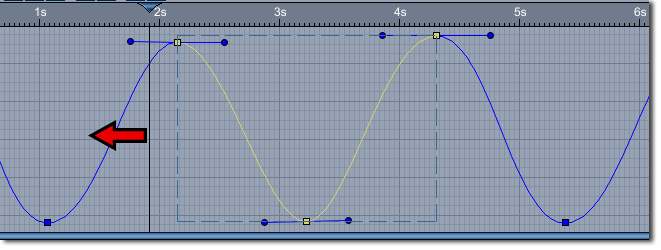
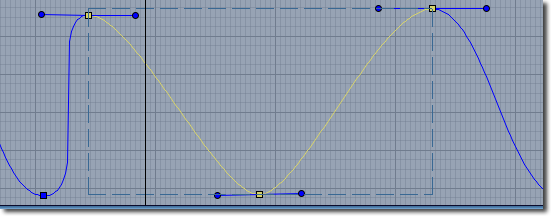
To decrease the duration of the selection by shrinking to the right simply click on the left border of the selection box and drag to the right. This will move the left most key frame down the timeline while preserving the relative spacing between all key frames in the selection box.
Adjusting the Scale
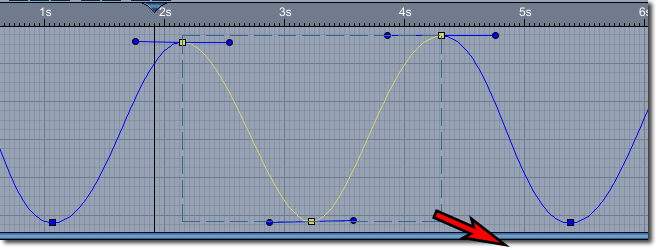
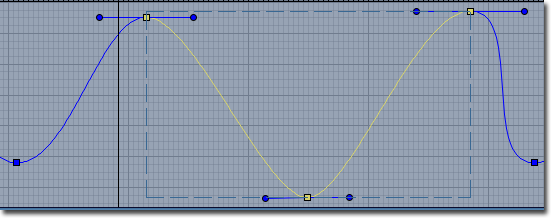
The selection box can also be scaled. This will manipulate the selection in both time and space. To scale the selection box simply click on one of the corners of the box and adjust the selection in either time (x-axis) or space (y-axis).
Note: If there is a key frame on the corner that is being clicked on the selection will translate rather than scale.
Translating the Selection
The selection can also be translated in either time or space. After a selection has been made and the selection box has appeared click on a key frame and drag. This will move the entire selection without changing the spacing between key frames. If the animation contains key frames that aren't part of the selection the distance between the key frames closest to the selection and outer key frames of the selection will change.
Wrap-Up
The graph editor provides a powerful yet simple way to adjust an animation in both time and space. The new tools allow users to change the amplitude and timing of an animation across a single track, or multiple tracks. This is useful in many applications, but it is of note that phonemes can easily be edited in this manner. The graph editor is a powerful tool for fine tuning a lip sync animations.
