User Tools
Site Tools
Sidebar
Exporting Displacement Maps From Hexagon 2 to 3DS Max
A tutorial by Juan Carlos.
This short tutorial will show you how to export your Hexagon 2 model and displacement map, to render it in 3ds Max.
Exporting the Model and the Displacement Map

The 3D model and its UVs unfolded.
Before beginning the tutorial, you must be sure to make a UV mapping for the model. You can make this using the Unfold tool, located in the UV & Paint tab.

The icon of the Export Bump Tool.
In the same tab, hit the “Export bump” tool.
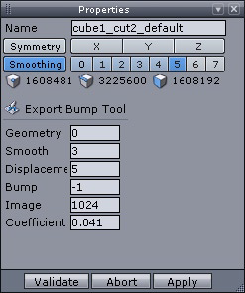
The Export Bump Tool parameters.
In “Export smooth” put 3, and 5 in “Export Displacement” depending of your Smoothing of your model and select the image that you like. Make sure you remember the “Disp coef” number to add later in 3ds Max and click validate.
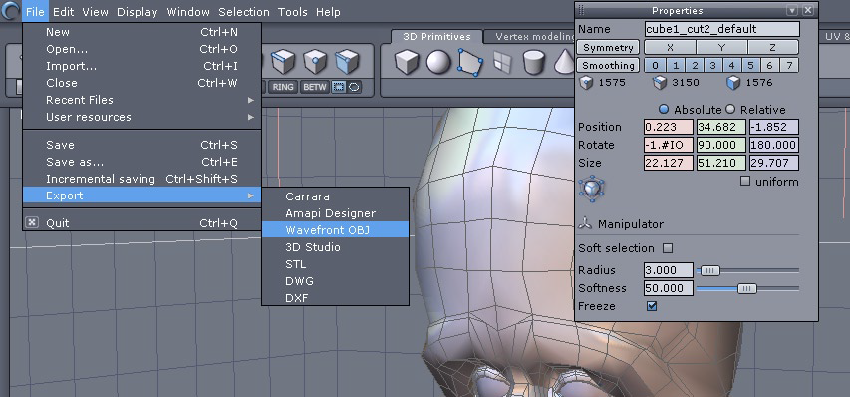
On the left, the export menu. On the right, the Smoothing unchecked.
Uncheck the smoothing and export the model in .obj. Be sure to have the two first options checked in the export dialog box.
Import the Model in 3DS Max and Render

The 3D model in 3ds Max.
Import into 3ds Max the OBJ model. If you own an older version of 3ds Max and don’t having the OBJ import, search on the Internet a free plug-in named OBJ2MAX.
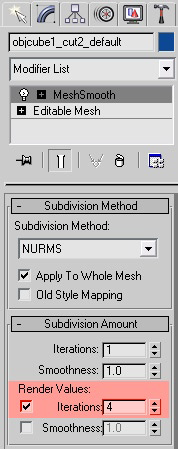

The smoothing parameters.
Select the model you want to add the displacement map to, then go to Modify tab from the left and select “Mesh Smooth” from the object space modify list. Check render values and add 4 iterations – this is for the final render smoothing.
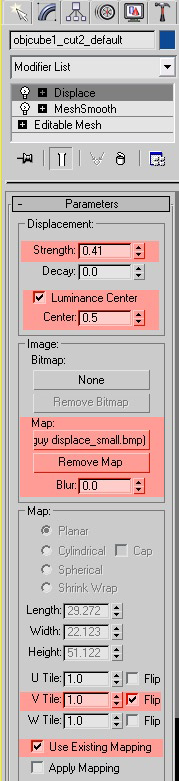
The displacement modifier and its parameters.
Be sure you add all these settings:
In strength add the Disp coef number from Hexagon 2 (you can increase the percentage to get more details if you want) and check luminance center.
Add the map, flip the V for the image and check the use existing mapping to use the UV map you made in Hexagon 2.

The final render.
Then hit F9 to see your render!
Note: It is also possible to add the displacement map in the Displacement channel of the material, and use Mental Ray to render your model.
Page Tools
Except where otherwise noted, content on this wiki is licensed under the following license: CC Attribution 3.0 Unported
