User Tools
Site Tools
Sidebar
Making Morphs for Genesis Figures using Hexagon's Displacement Brush
The Displacement Brush tool in Hexagon allows you to displace polygons on a model, either toward the inside or the outside of a surface, based on the normal to the surface. Using the displacement brush you can deform a mesh in order to create a morph. This article describes some aspects of morph creation workflow for Genesis figures using the Daz Studio Hexagon bridge and the displacement brush tool.
Genesis figures use 4096×4096 texture maps for the material properties of the mesh: diffuse color, specular highlight, etc. When you use the bridge to Hexagon from Daz Studio, all the material grouping and material properties of the selected content is sent across the bridge into Hexagon.
When you are using Hexagon to create morphs for content, the material properties of the mesh are usually of no concern because we only care about the deformed shape of the mesh that will be used to create a morph in Daz Studio.
However, Hexagon will make copies of the applicable textures on a mesh to support undo of operations when using the painting and displacement brush tools. Making copies of all the relevant textures for a Genesis figure while painting with the displacement brush consumes quite a bit of memory. When using the displacement brush on the full Genesis figure, this will often cause Hexagon to exhaust all available memory and report an internal error.
To avoid memory exhaustion while making a morph, we just need to tell Daz Studio not to send the textures to Hexagon across the bridge and only send the mesh that we are going to deform. Using the Surfaces pane, we can remove all the texture maps from the diffuse property of the mesh before sending it across the bridge. Different parts of the Genesis figure will use different diffuse texture maps, so to avoid sending any diffuse texture maps, we want to disassociate all diffuse texture maps from the entire figure.
To do this, perform the following steps:
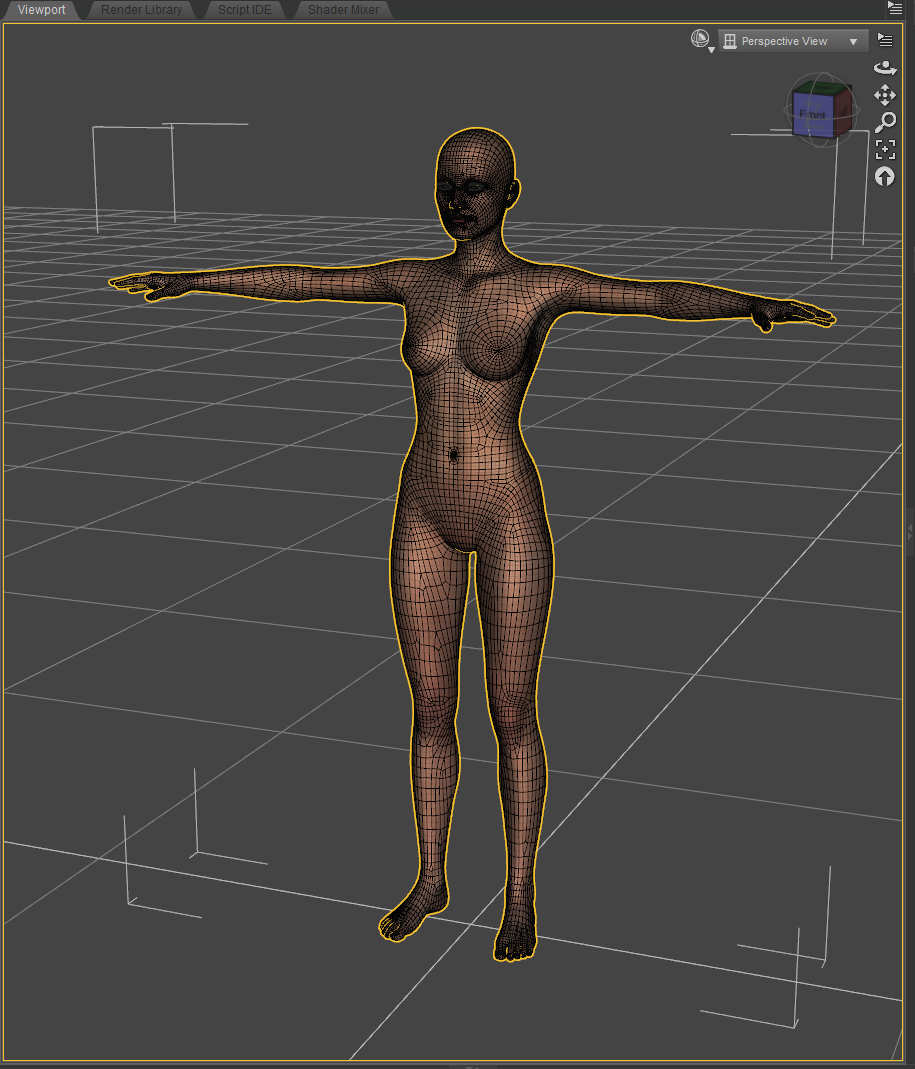
- Select the figure in the Viewport:
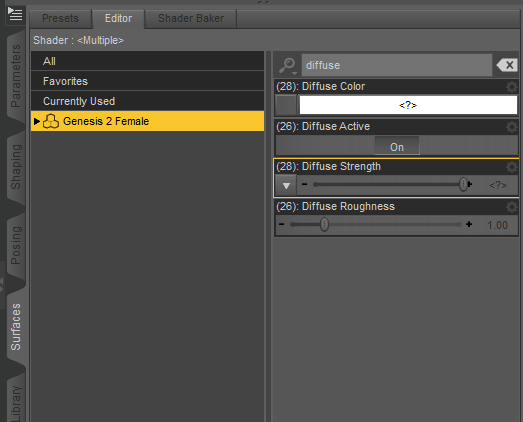
- Select the Surfaces pane:

- Under Currently Used will be the selected item, in this case Genesis 2 Female. Select Genesis 2 Female in the Surfaces pane to see all the currently used surface properties. Since there are so many properties, we can narrow the view to only those diffuse material properties by entering “diffuse” into the search box on the right:
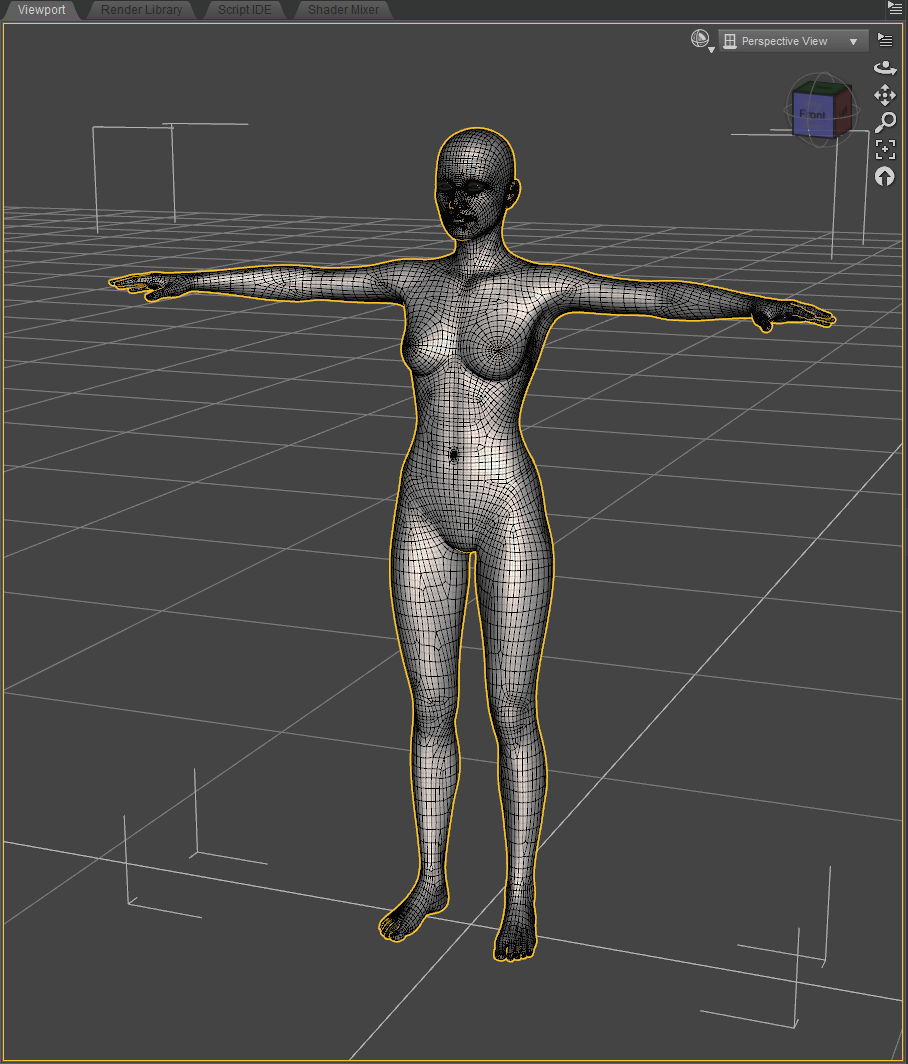
- Now disassociate all the diffuse color textures by clicking the square button below and to the left of the name of the Diffuse Color property and select None:

- The selected items in the scene will now display as a simple surface using their diffuse color property:
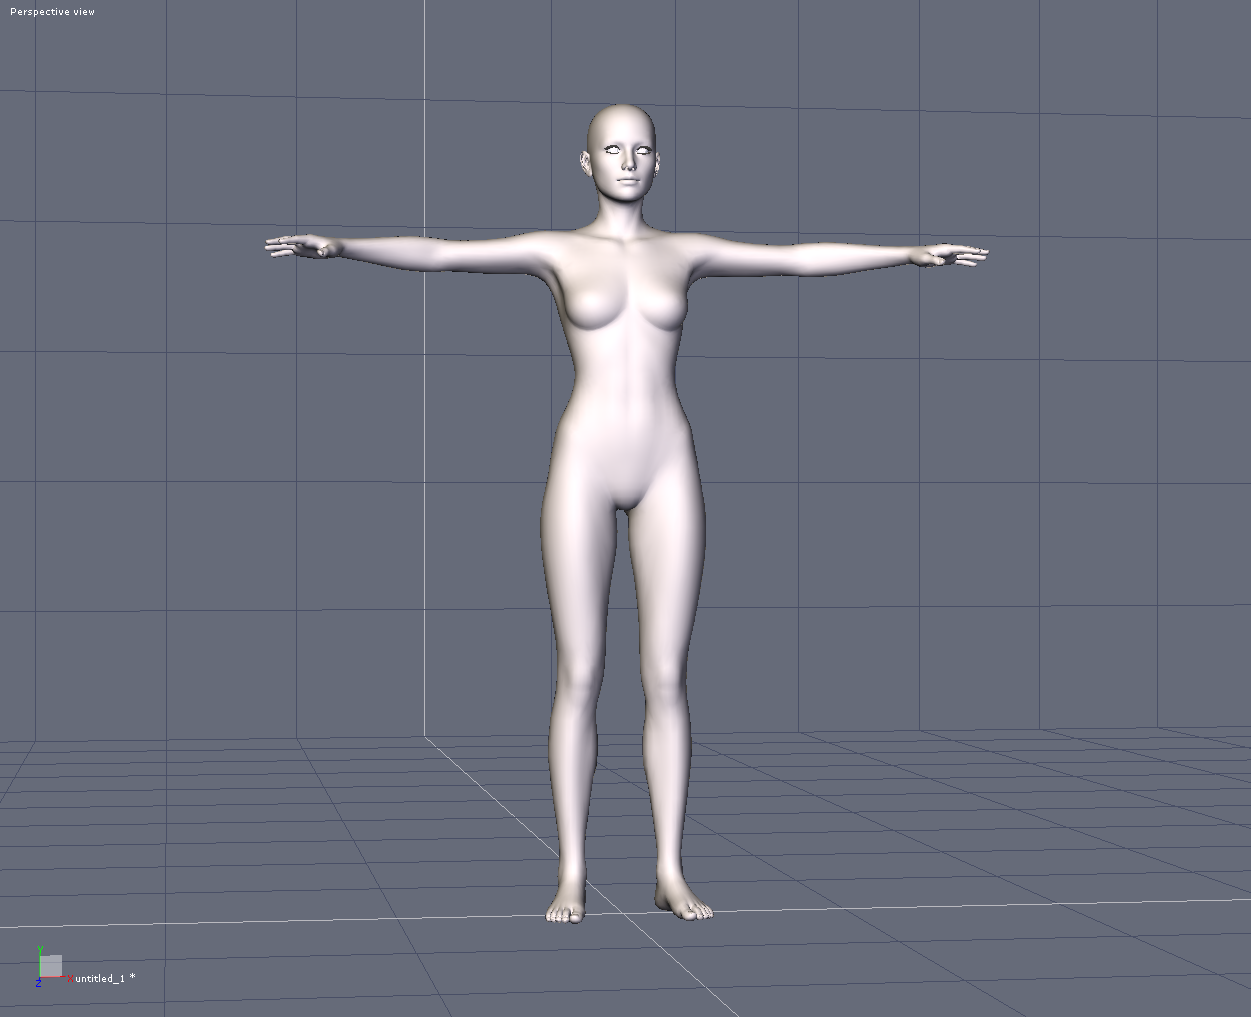
- Now send the mesh to Hexagon to use the displacement brush to create a morph. It will display in Hexagon with no texturing:
- Create your morph and send back to Daz Studio through the bridge to create the morph.
Page Tools
Except where otherwise noted, content on this wiki is licensed under the following license: CC Attribution 3.0 Unported
